A sump pump is an essential yet often overlooked component of home infrastructure. Its role is simple but critical: to prevent water from flooding your basement or crawl space. However, when sump pumps fail, the consequences can be catastrophic, leading to thousands of dollars in water damage and mold remediation. Homeowners often approach sump pump maintenance as a reactive process—addressing problems after they occur. But what if we could transform this mindset and take a proactive, fundamental approach to sump pump maintenance? This article will explore sump pump care from first principles, breaking down the core elements of how sump pumps work and what is required to ensure long-lasting performance.
The Core Function of a Sump Pump: Understanding the System
At its core, a sump pump is designed to move water from one place (the sump pit) to another (typically away from the house). This simple function belies a more complex set of dependencies that must be understood if we want to maintain the system efficiently.
From a first-principles perspective, a sump pump’s operation relies on:
- Water Detection (Float Switch or Sensor): The system must be able to detect when the water level is high enough to require pumping.
- Pumping Efficiency (Motor and Impeller): The system needs a mechanism for moving the water quickly and efficiently.
- Water Disposal (Discharge Pipe and Check Valve): The system must direct the water away from the home without allowing backflow.
Understanding this, we can see that if any of these three core elements fail, the entire system collapses. Therefore, proper maintenance should focus on preserving the integrity of these key components.
Step 1: Regular Testing and Inspection – Ensuring System Reliability
Most homeowners rarely think about their sump pumps until there is a problem. However, waiting until a pump fails during a storm is a recipe for disaster. The key to avoiding such situations is routine testing and inspection.
Monthly Testing
One of the most basic yet essential maintenance tasks is regularly testing your sump pump. To do this, pour a bucket of water into the sump pit. The pump should activate when the water level rises to the float switch’s threshold and promptly pump out the water. If it doesn’t start, or if it struggles to drain the pit efficiently, something is wrong.
This simple action verifies that both the float switch and the motor are functioning properly. It addresses the two core elements of water detection and pumping efficiency.
Annual Inspection
Once a year, a more thorough inspection is necessary. During this process, you’ll want to:
- Check the Float Switch: Ensure it moves freely and isn’t obstructed by debris in the sump pit. A stuck float switch is one of the most common reasons for sump pump failure.
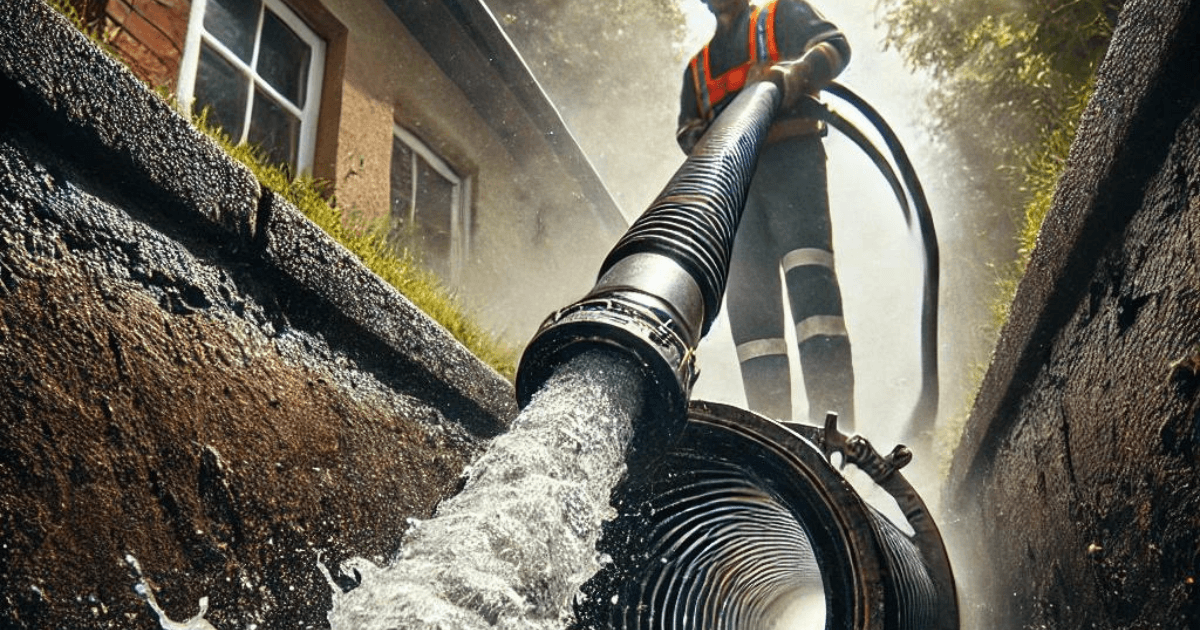
- Examine the Discharge Line: Ensure the discharge pipe is clear and water can flow freely. Blockages in the line can cause water to back up and put unnecessary strain on the pump.
- Inspect the Check Valve: The check valve prevents water from flowing back into the sump pit. A faulty valve can lead to overworking the pump, reducing its lifespan.
Step 2: Cleaning the Sump Pit – Reducing Wear and Tear
Your sump pump operates in a pit that collects not only water but also debris, dirt, and sediment. Over time, this accumulation can affect the efficiency of your pump. A clogged sump pit can impede the movement of the float switch, block the pump’s intake, or damage the impeller. From a first principles perspective, the more debris in the pit, the more the pump has to work, reducing its lifespan.
How to Clean the Sump Pit
- Turn Off the Pump: Before starting, make sure to disconnect the power to avoid any risk of electrocution.
- Remove Large Debris: Manually remove any large debris, such as rocks, mud, or leaves, from the sump pit. A clean pit allows water to flow smoothly to the pump’s intake.
- Flush the System: Once the large debris is removed, flush the pit with clean water to wash away any remaining sediment. This helps prevent clogging and ensures the impeller remains debris-free.
By regularly cleaning the sump pit, you reduce the mechanical stress on the pump, prolonging its life and ensuring its efficiency.
Step 3: Battery Backup System – Preparing for the Unexpected
One of the most common causes of sump pump failure is a power outage, often during storms when the pump is needed the most. A proactive maintenance strategy must account for these situations by integrating a battery backup system.
How a Battery Backup System Works
A battery backup system ensures that your sump pump continues to function even when the power goes out. The battery powers the pump for several hours, giving you time to restore electricity or clear the water manually if necessary.
From a first principles perspective, the introduction of a battery backup system addresses the vulnerability of power dependency by providing redundancy in case of failure. This ensures that the critical function of pumping water away from the home remains operational when it’s most needed.
Maintaining the Backup System
- Test the Backup System: Just as you regularly test the primary pump, the battery backup system should be tested monthly to ensure it’s ready when needed.
- Replace the Battery: Depending on the type of battery, it should be replaced every 2-5 years to ensure reliability.
Step 4: Lubricating the Motor – Reducing Friction
Many sump pumps rely on a motor with moving parts that can wear down over time due to friction. This is especially true for pumps that operate frequently during heavy rainfall seasons. Friction increases the energy required to run the pump, reducing efficiency and increasing the risk of failure.
Motor Lubrication
Lubricating the pump’s motor can help reduce this friction. Refer to the manufacturer’s recommendations, as some sump pump motors require specific types of lubricants. By keeping the motor lubricated, you minimize wear and tear, ensuring that the pump continues to operate smoothly over the long term.
Step 5: Protecting the Discharge Pipe – Avoiding Freezing and Blockages
A sump pump can only be as efficient as its discharge system. If the discharge pipe is clogged or frozen, water cannot be expelled, leading to flooding. Preventing these issues involves both preventive maintenance and ensuring the system is designed to handle your environment.
Preventing Freezing
In colder climates, discharge pipes can freeze, preventing the pump from draining water. To avoid this, you can:
- Use an Insulated Discharge Pipe: Install a larger, insulated pipe to prevent freezing.
- Ensure Proper Sloping: The discharge pipe should be sloped to ensure that water flows away from the home and does not accumulate in the pipe where it can freeze.
Clearing Blockages
Regularly inspect the discharge pipe to ensure it’s free of debris. Installing a discharge pipe filter or guard can prevent leaves, dirt, and other debris from clogging the line.
Step 6: Upgrading Components for Long-Term Reliability
The performance of your sump pump can often be enhanced by upgrading certain components that are prone to failure. For example:
- Upgrading the Check Valve: A high-quality check valve can reduce wear on the pump by preventing water from flowing back into the pit.
- Installing a Sump Pump Alarm: A sump pump alarm alerts you when the water level in the pit rises too high or when the pump fails to operate.
These small upgrades can significantly extend the life of your sump pump, making it more resilient to failure.
The Consequences of Neglecting Sump Pump Maintenance
Ignoring sump pump maintenance can result in catastrophic damage to your home. Flooded basements can cause thousands of dollars in repairs and lead to long-term issues such as mold growth, which can compromise the structural integrity of your home and pose health risks.
From a first-principles standpoint, neglecting maintenance increases the chances of failure at the most inopportune times—such as during a storm—when the system is under the most stress. Proactive maintenance reduces the likelihood of failure by addressing core vulnerabilities before they become major problems.
Conclusion: Transforming Sump Pump Maintenance
Maintaining your sump pump for long-lasting performance is not just about reacting to problems as they arise. By applying first principles thinking, we can see that the longevity of your sump pump depends on regular testing, cleaning, and upgrading of critical components. From installing a battery backup system to ensuring that the discharge pipe remains clear and functional, proactive maintenance ensures that your sump pump will be there when you need it most.
Don’t wait for a rainy day to find out that your sump pump has failed. Implement these maintenance strategies now to protect your home and keep your basement dry for years to come.
FAQ: Maintaining Your Sump Pump for Long-Lasting Performance
1. How often should I test my sump pump?
It’s recommended to test your sump pump every 1-3 months to ensure it’s working properly. You should pour water into the sump pit to see if the pump activates and drains the water efficiently. This simple test helps verify that the float switch and motor are functioning as they should.
2. How can I tell if my sump pump needs to be replaced?
Common signs that your sump pump may need replacing include:
- Strange noises such as rattling, grinding, or screeching.
- Frequent cycling (the pump turns on and off repeatedly).
- The pump runs but doesn’t remove water effectively.
- The pump is more than 7-10 years old—the typical lifespan of most sump pumps with regular maintenance.
3. What is the most important maintenance task for a sump pump?
One of the most crucial maintenance tasks is cleaning the sump pit regularly. Debris like dirt, mud, and small rocks can clog the pump and cause it to fail. Keeping the pit clear ensures the float switch can move freely and the pump’s intake remains unobstructed.
4. Do I need a battery backup system for my sump pump?
Yes, a battery backup system is highly recommended, especially in areas prone to power outages during storms. It ensures your sump pump continues to operate even if the power goes out. Without a backup, your home could flood when the sump pump is needed most.
5. Can I install a sump pump myself?
For those comfortable with DIY projects, installing a sump pump is possible, especially if you’re replacing an existing one. However, for new installations or more complex systems (such as adding a backup pump or dealing with specific drainage issues), it’s often best to hire a professional plumber to ensure it’s done correctly.
6. What causes sump pump failure?
Sump pump failures are often caused by power outages, clogged discharge pipes, a stuck float switch, mechanical wear over time, or improper installation. Regular maintenance can help mitigate most of these issues.
7. How can I prevent my sump pump discharge line from freezing?
To prevent freezing, ensure your discharge line is sloped properly to allow water to flow out completely. You can also install a larger, insulated pipe or a discharge line extension to direct water further away from your home and reduce the chance of freezing.

